Search This Blog

Sunday 29 January 2012

Reports


Peachtree accounting software gives us the facility to view the different reports we have made in peachtree.
To view the reports, click on the Reports and then select General Ledger, as we see below


The following window will open


As we can see in the above screen that there are different reports given.  We can select here any report which we want to see. For seeing the any report, click twice on it, the report will open. As we can see below                                                                                                                                                           

We can also print these reports. The software gives us the facility to either print the whole report or a part of it.
For extracting any part of the report for printing, click on the Options button present in the second header. Then the following screen will appear


Here we have to select the range that we want to print.

 After selecting the range, the screen will look like as follows

Then press the Ok button
The report with our selected range will appear, as we can see below

Now we can print this extracted part of the report.
The soft ware also gives us the facility to save any report in form of a new excel sheet or add any part of a report  to any existing excel sheet.
For saving the report in form of excel sheet, press the Excel button which is present in the header.
By pressing the Excel button, the following screen will appear.

We will select our desired option from the both and press the Ok button.


We can see that the report is converted into an excel sheet. Now we can save this or print this, as we need.

Quotes / Sales Order


Quotes are prepared when our customer wants to purchase the goods and send us a quotation.
In order to know that how to make quotes in peachtree, click on the Tasks menu and then select Quotes/Sales order and then the Quotes, as we can see below

Then the following screen will appear

Here, first of all we have to select the customer from the magnifying mirror of the Customer ID, as we can see below


After selecting the customer, the window will look like as follows


Now we have to give the
  • Date of quote in the Date
  • Date of delivery of order in the Good Thru
  • Quote number in the Quote No.
  • Mode of delivery of goods in the Sip Via
  • Any terms of contract in the Terms
Then the screen will look like as follows


Now we have to select the item which the customer wants to purchase from the Item,        as we can see below                             
                                                                                                                                                                                                                                                  

After selecting the item, the screen will look like as follows


Now; for the selected item, we have to give the quantity of item that our customer wants to purchase in the Quantity, per unit price of that item in the Unit price. The software will automatically make the total of the order. As we can see below

We can save the quotes, we have made, by pressing Alt + s or by pressing the Save button in the header.
Note:
We can also view the saved quotes by pressing the Open button in the header.


Sales Order
Sales orders are made when our customer want to purchase the goods.
In order to know that how we can record the sales orders in peachtree, click on the Tasks menu and select Quotes/Sales Orders and then select Sales orders, as we can see below


Then the following screen will appear


Here, first of all we have to select the customer from the Customer. We can select the customer either by clicking on the magnifying mirror in the box of Customer ID or by pressing Shift +? , as we can see below


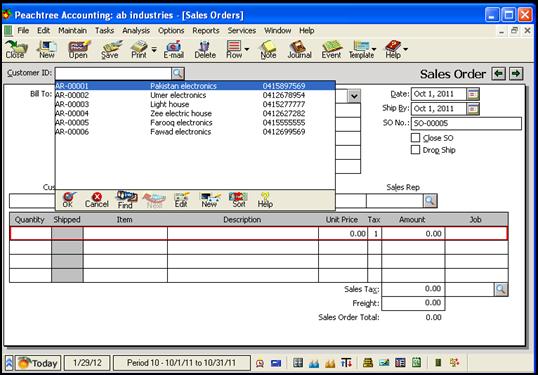
After selecting the customer, the screen will look like as follows


Now we have to give the
  • Date on which we are recording the sales order in the Date
  • Date of delivery of order in the Ship By
  • Sales order number in the SO No.
  • Terms of contract if any in the Terms
  • Mode of delivery of goods in the Ship Via
Then the screen will look like as follows

And now, we have to select the item that our customer wants to purchase from the magnifying mirror of the Item, as we can see below

After selecting the item, the screen will look like as follows


Now; for the selected item, we have to give the quantity of item that our customer wants to purchase in the Quantity, per unit price of that item in the Unit price. The software will automatically make the total of the order. As we can see below


We can save the sales order, we have made, by pressing Alt + s or by pressing the Save button in the header.
Note:
We can also view the saved sales orders by pressing the Open button in the header.


Converting a quote into a sales order
An already saved quote can be converted into a sales order.
For this purpose, first of all we have to open the window of quote,


The quote window is as follows

Now, we have to open that quote which we want to be converted into a sales order. For opening the quote; press the open button in the header.
The following screen will appear


Double click on the desired quote will open that. As we can a open quote below


Now press the Convert button present in the header, the following screen will appear


In the above screen, select the sale order and give the sale order number in the SO #
As we can see below


And then by pressing the Ok button, the quote will be converted into a sales order.

Saturday 28 January 2012

Payments


In order to know that how to make payments in peach tree, click on the Tasks menu and then select Payments, as we can see below


Then the following screen will appear


This is the payment window, here we can either make payment to our vendors or can also make the payment of any expenses (for example utilities bills expense, salaries expense)
We can see in the window that here are two tabs, Apply to Expenses tab is by default activated, and this is used to directly make the payments either to the vendor or to pay any expense. Apply to Invoices tab is activated automatically when we select such vendor from whom we had purchased the goods under an invoice.
In order to make payment to the vendor, we have to select the vendor ID from the magnifying mirror which is in front of the Vendor ID, as we can see below

As we selected the vendor ID of that vendor from whom we had purchased the goods under an invoice, the Apply to Invoices tab is activated, as we can see in the screen below


Now we have to give the
  • Date on which we are making the payment in the Date
  • Check number in Check Number
  • Description of the items for those we are making the payment.
We can also select the relative account the Cash Account present on the extreme right side of the window.
After giving all these details, the window will look like as follows;


Now by clicking on the box in the Pay, the payment will be made, as we can see below


Note:
We can save this payment record by pressing Alt + s or the Save button in the header.
We can also view the saved record of payment by pressing the Open button in the header

On the other hand, in order to make payments for the expenses, 


We have to give the
  • Name of the expense in the Pay to the Order of
  • Description of the expense in the Description
  • GL Account related to the expense in the GL Account
  • And the amount of payment in the Amount
  • Date on which we are making the payment in the Date
  • Check number in the Check number
As we can see below


So, this is the procedure of recording or making the payments through peach tree accounting software.


Vendor credit memos


Vendor credit memos are prepared when we want to return the purchased goods/ raw material to the vendor of our company.
In order to know that how to make vendor credit memos in peach tree accounting software, click on the Tasks menu and then select Vendor Credit Memos, as we can see below


Then the following screen will appear


In this screen, select the vendor from the drop down list of vendor ID (whom we want to return the goods).
Note:
If we had purchased the goods from our selected vendor through an invoice, the Apply to Purchases tab will automatically shift to Apply to Invoice No. tab, otherwise do not shift.


Here we can see that by selecting that vendor from whom we had purchased the goods through invoice, the Apply to Purchases tab had shift to Apply to Invoice No. tab
Now we have to select the invoice number from the drop down button in front of Apply to Invoice No., as we can see below


By selecting the invoice number, the software will give us the details of the goods we purchased from our vendor, as we can see below


Now we have to give the Credit No. and the date in the Date
And after that the quantity of the returned goods in the Returned, the software will automatically make the total of the returned goods.


Then we have to press the Alt + s or the Save button in the header to save this vendor credit memo.

Note:
We can also view the previous vendor credit memos by clicking on the option of the Open in the header.